A User’s Look at OpenStack Networking, Part 2
philhopkins

Let’s build something with what we learned in part one of our series,“A Users Look at OpenStack Networking.”
In this, part two, we’ll use the OpenStack dashboard to create a network, add a subnet onto the network and examine what we built. You may follow along by just reading, but if you have access to an OpenStack environment, I encourage you to experiment as you follow along.
After logging into the OpenStack dashboard, navigate to the Networks page, which appears like the one shown below:
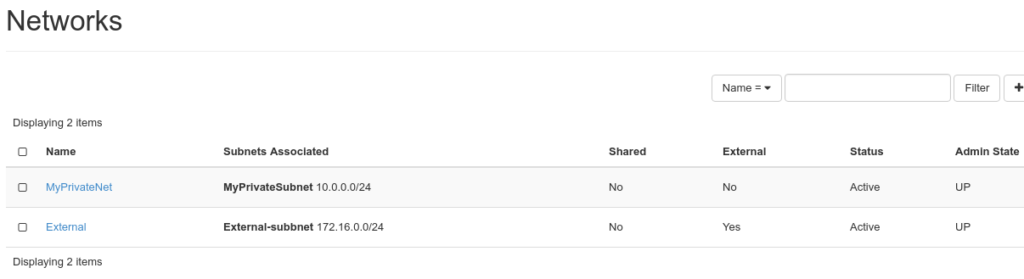
In my OpenStack setup, the administrators have created two shared networks and one external network. Yours will be different, so pay close attention to what shared and external networks may be available to you. If you have any questions about your networks, check with your OpenStack administrator.
The external network will be of interest, since this will be the network that give our instances connection to the internet.
To create a project network, click on the Create Network button on the left side of the page. You will see the Create Networks popup, as shown below:
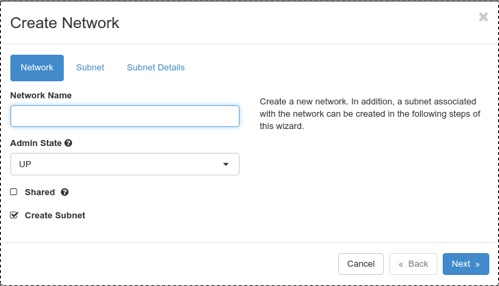
We will create both our network and a subnet from this window. Into the Network name box, enter a network name. I will use “MyFirstNet” as a name and click on the next button to define the subnet we will use. We can see this in the graphic below:
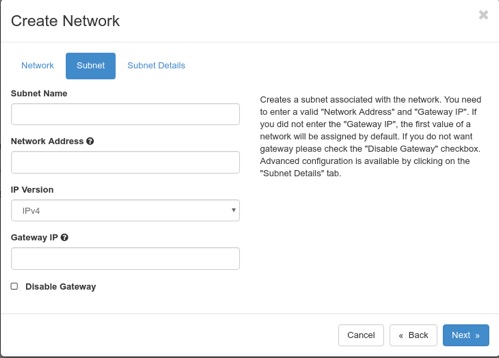
Let’s name this subnet “MyFirstNet-subnet” and enter that into the Subnet Name box. Enter a CIDR address of 10.1.0.0/28 into the Network Address box (this will give us about 11 to 13 usable addresses for instances). We will use the default gateway address of 10.1.0.1 for this subnet so we can leave the Gateway IP box blank. Click on the next button and see the Subnet Details box open as:
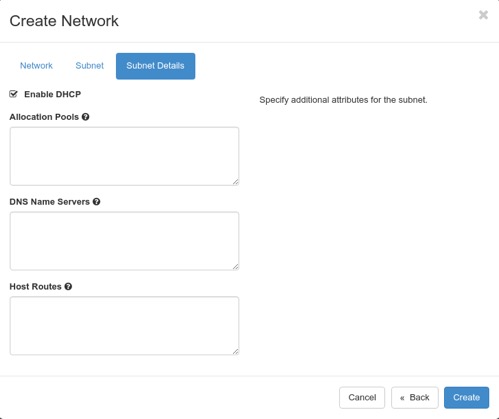
If we wanted to restrict the pool (range) of IP addresses that could be used for instances, we could do it by entering the address range into the Allocation Pools box. To have our instances use specific DNS servers, we define these by entering the IP addresses for the servers into the DNS Name Servers box. Lastly, if for some reason we want host routes injected into our instances, we can enter them into the Host Routes box. In our example, we are not going to enter any data into these boxes, so click on the Create button.
Let’s take a close look at what we just created. The OpenStack dashboard gives us the tools to look at the details of each item. After the network and subnet were created, the dashboard returned us back to the main network page, except now the newly created network shows on the page. The name, “MyFirstNetwork,” is a hyperlink that if we click on to will take us to a page showing all the information related to the network as seen below:
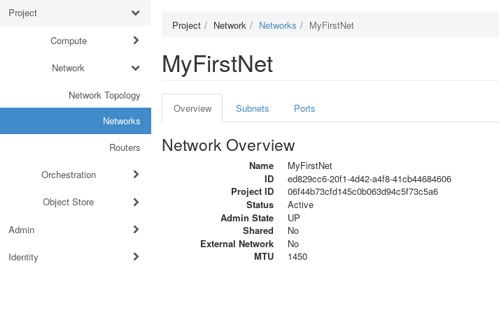
As expected, the status for the network is active and the admin state is up. The shared and external network options show No. Interestingly, the MTU is showing to be 1450 instead of the normal 1500 bytes. That is because this OpenStack cloud is using VXLANs, to keep the networks isolated from each other. VXLAN technology requires 50 bytes of the packet to encapsulate an instance’s data packet. OpenStack knows this, so it automatically restricts the MTU to 1450 bytes for our new network.
On the network page we can see any subnets created on this network. We can look at information about the subnet by clicking on the Subnet tab. Again the name, “MyFirstNet-subnet” is a hyperlink to a page that shows all the details about our subnet as shown below:
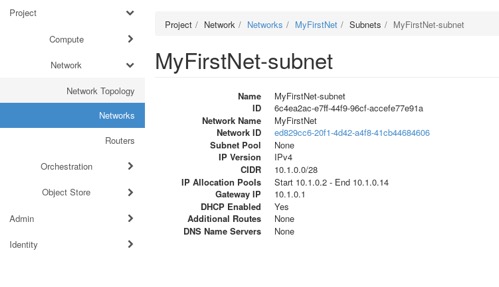
Again, no surprises here. Everything is as we created it. One new field is Subnet Pool, which can be created to predefine subnet CIDRs to be used in subnet creation. These pools can only be created from the CLI. Creation and use of these pools are beyond the scope of this series of articles.
Finally, we can examine the ports created for this subnet by clicking on the back arrow to go to the previous page, then clicking on the port tab. Here we see the port(s) for the DHCP servers that have been created. The number will vary depending on how your OpenStack cloud was designed. If the DHCP servers were set up in an HA mode, typically there will be two or three servers built. Under the Names column, each name will be a hyperlink to the a page showing the detail about each port. One such page is shown below:
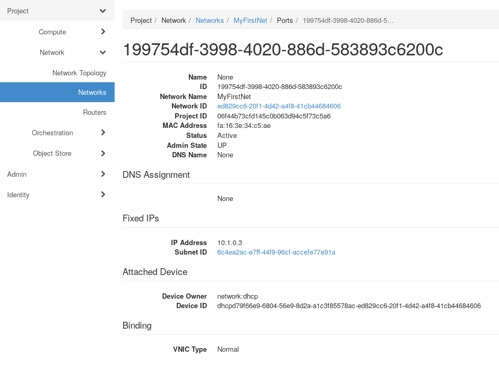
Here we can see the information about this port, including the UUID’s of the associated network and subnet, the port’s MAC and IP addresses and that the port is in an active status.
Tune in next week for part three in the User’s Look at OpenStack Networking series, which will cover the creation and use of routers in OpenStack.
Rackspace is the world’s leading OpenStack service provider. To learn more about OpenStack, attend a public training session or schedule a private training class with our experts. For a complete schedule of class offerings, please visit the Rackspace Training page.

Recent Posts
ViVE 2024 Attendees Explored the Leading-Edge of Healthcare Technology in Los Angeles
March 5th, 2024
How to Accelerate Your Microsoft 365 Copilot Launch with FAIR and Rackspace Technology
February 27th, 2024