A User’s Look at OpenStack Networking, Part 4
philhopkins

In parts one through three of our OpenStack networking series, we covered the basics of networking, built a network that will provide connectivity for any virtual machines we may create and created a router to direct traffic between our private network/subnet and the internet.
Now we have our network almost ready to go — but first we need to secure our environment before we create an instance.
Exploring OpenStack network security
A traditional network uses firewall rules. But getting the network security folks involved would slow us down. That is where OpenStack comes to the rescue: through the use of security groups, we can easily control access to our server. Both the OpenStack CLI and the dashboard help us to easily set up rules that will only allow access to our server through the TCP ports we open.
OpenStack performs basic network security through a feature called security groups. When an instance is created, it must belong to at least one security group. If a security group doesn’t exist, OpenStack creates a default security group to protect the instance. Any instance can belong to multiple security groups controlling the types of network traffic allowed to the instance. Additionally, security groups can feed other security groups, allowing for complex filtering policies.
The basic default security group policy allows all traffic between instances on the same subnet, and allows all outgoing traffic, but blocks all traffic originating from outside the subnet.
For our example, we are going to assume that we are setting up a web server:
- We will need to allow incoming traffic on TCP ports 80 (HTTP) and 443 (HTTPS).
- Additionally, we want to be able to access our server using SSH, so we need to open TCP port 22.
- Lastly, we want to allow ICMP pings to the server, so we will allow all ICMP traffic, even though a ping only uses the ICMP echo request and echo reply packets. There are other uses for ICMP traffic, such as Path MTU Discovery (PMTUD) that our server may need, which is why we will allow all types of ICMP traffic.
After logging into the dashboard, click on the Instances line on the left nav bar under the Projects section, then click on the Access & Security line and you will see the web page shown below:

If one of the other tabs are open, click on the Security Groups tab. We can create our Web security group by first clicking on the Create Security Group button and you will see the Create Security Group popup as shown below:
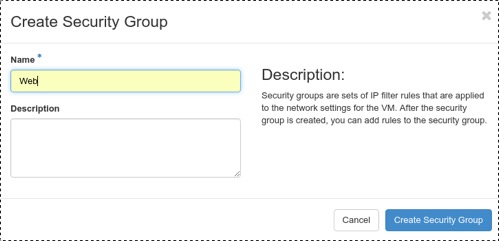
Enter Web into the Name box and click on the Create Security Group button. This will return us to the Access & Security web page. We now need to add some rules to our Web security group. Click on the Manage Rules button on the far right of our Web security group that we just created and we will be directed to the Manage Security Group Rules page for our new security group as shown below:
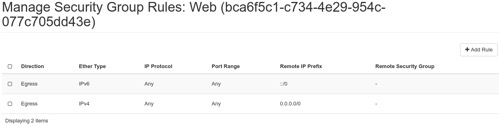
There will be two default rules in this group allowing all outbound traffic. We need to add rules to allow inbound traffic on TCP ports 80, 443, 22, and all inbound ICMP traffic. If we click on the Add Rule button on the right, we will get the Add Rule popup as seen below:
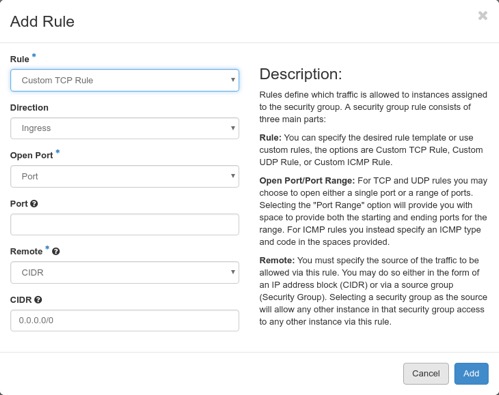
To set the TCP port 80 rule, in the Rule pull down select HTTP, the box will change giving us only two additional options, that of remote and CIDR. Leave the defaults for these since they will allow inbound access from all remote IPs and click on the Add button. We will be returned to the Manage Security Group Rules page and we that see our new rule has been created.
Repeat the process to add rules for HTTPS, SSH, and a rule for all ICMP traffic. We now have a security group with six rules. All outgoing traffic will be allowed and only incoming traffic on TCP ports 80, 443, and 22 will be allowed.
At this point, we have our network set up for our web server. We can now add a public IP to that server and we will be finished. Launching the instance is outside the scope of this networking series, however you can go to the instances link in the left nav area and from there launch a new instance. You will need a running VM for the last part of this series, where we will add a public IP to the instance.
And that's it. We created the firewall rules to allow web traffic to a server. If you’re been following along in an actual OpenStack environment, the network is now ready to use — as soon as we assign a public IP to it, which we'll do in the final post of the series.
Rackspace is the world’s leading OpenStack service provider. To learn more about OpenStack, attend a public training session or schedule a private training class with our experts. For a complete schedule of class offerings, please visit the Rackspace Training page.

Recent Posts
Driving Innovation into Today’s Automotive Market: Powering Stronger Customer Experiences
May 2nd, 2024
Google Cloud Next ’24 Highlights
April 23rd, 2024